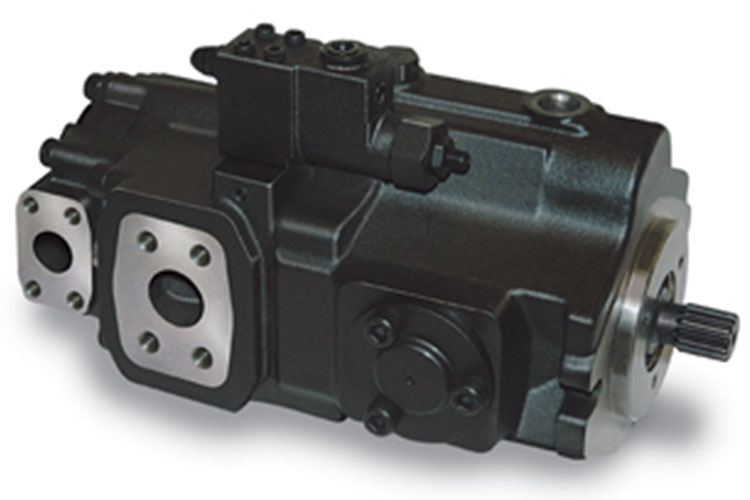
Denison Hydraulic Piston Pumps or Denison Hydrostatic Piston Pumps and Denison Hydraulic Motors or Denison Hydrostatic Motors
PF & MF 04 PF & MF 08 PV & MV O7 PV 6
PF & MF 05 PF & MF 09 PV & MV 08 PV 10/15
PF & MF 06 PV & MV 05 PV & MV 09 PV 20/29
PF & MF 07 PV & MV 06 PXX 1223 Gold Cup Series
1. Fit in the barrel (1) with the bores facing
down on a clean area.
Place the hold down spring (3) into barrel counter-
bore.
Put in spring retainer (5) into counter bore and
seat next to spring.
Place the retaining ring (6) into barrel counter-
bore groove. Align retaining ring so that it is fully
seated in groove.
Fix the barrel stop (4) over auxiliary drive
shaft (2). Rotate barrel on side and put the auxiliary
drive shaft and barrel stop into the barrel
spline and hold down spring.

PARTS LIST
No. | a piip | ». P14P | Part Number | Explanation |
1 | 1 | – | 513-45381 | Barrel & sleeve assy Pi 1 P only |
– | 1 | S13-43965 | Barrel & sleeve assy PHP only | |
2 | i | 1 | 033-71603 | Auxiliary drive shaft |
3 | i | t | 033-71562 | Holddown spring |
4 | 1 | 1 | 033-71561 | Barrel stop |
5 | 1 | 1 | 033-71560 | Spring retainer |
6 | i | 1 | 033-71564 | Retaining ring |
Guidelines for Replenishing Circuit Isolation Plug
WARNING
The isolation plug together with this is to be used only if an external filter circuit is not offered DO NOT operate this unit with the isolation plug put in unless an outside line has been provided.
When the outer filter circuit is not used, dispose of the isolation plug.
When the outside filter circuit is used, fit the isolation plug under the plug in the face of the port block. Use a 3/16″ hex wrench, 4″ minimum in length. Insert the isolation plug and tighten to 80-120 in./lbs. torque.
Warning
Filter should have a bypass and bypass indicator and Hydrostatic Transmission Service,LLC which offers Denison recommends that it be sized four times for projected flow.
HOUSING ASSEMBLY S13-43962
1. Place housing (1) on a flat area with the
large open end up.
2. Push the bearing (2) into the housing bore
until seated. IT IS NOT RECOMMENDED THAT HAMMERING OR BEATING THE
BEARING INTO PLACE.
Put housing on side and install roll pin (3)
into the hole in control cover pad. Roll pin
ought to be installed 3/8″ under pad surface. Place
1. two dowel pins (4) in the blind holes in the same pad.
4. DO this (step 3) on the opposite side of the
housing.
5. Fit together O-ring (5) and plug (6) in the bottom of
housing. Roll pins (3) are in the bottom half of
the housing.


PARTS LIST – Housing Assembly S13-43962
No. | Oty. | Part No. | Description |
I | 1 | 033-71578 | Housing |
2 | 1 | 033-71516 | Bearing |
3 | 2 | 325-16320 | Roll pin |
4 | 4 | 324-21608 | Dowel gin |
5 | 1 | 691-00912 | 0-rmg |
6 | 1 | 488-35014 | Plug |
Caution
Be sure the Loose Pin is retained in the Port when putting together the System Pressure Gage
Replenishment—None
Servo—160 psi -(-case psi -(-62.5 psi per 1000 system pressure.
Case—40 psi max.
USUAL PRESSURES
Closed Loop
Open Loop
Replenishment—180-220 psi + Case Pressure.
Servo—300 psi + case
psi +40 psi per 1000 system pressure.
Case—75 psi continuous 125 psi intermittent
|
|
|
High wear in pump | Unwanted water in fluid | Water vapor Faulty breather, strainer Heat exchanger leakage ‘ wrongful clean-up practice Water in makeup fluid |
Pressure shocks | Cogging load Worn release valve | Mechanical considerations Needed repairs |
Worn compensator Slow response in check valves | Make repairs Replace or relocate | |
Servo pressure too low to sustain firm control | Increase pressure and check pressure drop through servo filter | |
Too much decompression energy rates | Improve decompression control | |
Excessive line capacitance (line volume, line stretch, accumulator effects) | Lower line size or lengths. Get rid of hose Bleed air | |
Barrel blow-off | Double check pump hold-down, rotary motion group, drain pressure | |
Heating of fluid | Excessive pump leakage | Look over again the case drain flow and repair as required Fluid too thin Improper assembly, port timing |
Relief valve | Set too low (compared to load or to compensator) Not stable enough that is caused by back pressure, worn parts | |
Compensator | Set too high (compared to release) Worn parts | |
Pump too large for fluid needs | Choose smaller pump displacement |
Heat exchanger | Water turned off or too little flow Water too hot Fan clogged or restricted Efficiency lowered by mud or scale deposits On and off hydraulic fluid flow |
Reservoir | Too little fluid Entrained air in fluid Improper baffles Keeping in air blanket that prevents heat rejection Heat pickup from adjacent equipment |
Revised Limits of Wear Parts
|
|
|
|
Port plate face | .725/.715″ | .010″ | .705″ |
Cylinder barrel face | 5.880″ | .010″ | 5.870″ |
Shoe retainer face | .4387.437″ | .005″ | .432″ |
Piston shoe face (pocket) | .020″ | .010″ | .010″ |
Creep plate face | .251/.250″ | .010″ | .240″ |
Face plate |
| None | Replace |
PROBLEM SHOOTING
Part problems and circuit problems are frequently inter-related. A faulty circuit may work with obvious success but will cause failure of a particular part within it. The part failure is effect, not the reason of the problem. This broad guide is on hand to help in locating and eliminating the cause of problems by studying their effects.
|
| Some of the Remedies for Problems |
Noisy Pump | Air in Fluid | Leak in suction line Leak at shaft seal Low fluid level Turbulent fluid Return lines above fluid level Gas leak from accumulator Too much pressure drop in the inlet line from a pressurized reservoir Suction line strainer trying to be an air trap as well |
Cavitations in pump or motor rotating group | Fluid too cold and viscous Fluid too heavy Shaft speed too high Suction line too small Suction line collapsed Suction strainer too small Suction strainer not clean Working altitude too high Boost or replenishment pressure too low Replenishment flow too small for dynamic conditions | |
Misaligned shaft | Faulty installation Improper in mounting Axial interference Faulty coupling Extreme overhung loads | |
Mechanical fault in pump | Piston and shoe looseness or failure Bearing failure Incorrect port plate selection or index Eroded or worn parts in the displacement control | |
Erosion on barrel ports and port plate | Air in fluid | See above |
Cavitations | See above |
High wear in pump | Excessive loads | Lower pressure settings Reduce speeds |
Contaminant particles in fluid | Faulty filter maintenance Filters too coarse Putting in dirty fluid to system Reservoir openings Reservoir breather Improper line replacement | |
Improper fluid | Fluid too thin or thick for working temperature range Breakdown of fluid with time/temperature/shearing effects wrong additives in new fluid Breakdown of additive effectiveness with chemical aging | |
Improper repair | Incorrect parts,procedures, dimensions, finishes |
Barrel and Stroking Assembly to Mounting Flange
- 1. Establish straight thread connectors (3) and O-
rings (4) into threaded holes in cradle. - 2. Fit in right and left hand pressure feed tubes
(5 and 6) to connectors (3). Tighten connectors
till it is snug. - 3. Place the mounting flange (9) with the large
open end facing up and Put together two dowel pins
(8) in the cradle mounting area and four
locating sleeves (10) in the outer edge of the
flange. - 4. Mount the rocker cam and cradle assembly (7)
over the dowel pins (8) in the mounting flange. - 5. With cam and cradle put in, place
mounting flange on the side and install two
3/8-16 x 2 screws through the seal retainer
surface into the cradle. These screws do hold in
the rocker cam assembly in
place and will be taken out later. - 6. Bring back the mounting flange to an straight up an down position
and slant the rocker cam to both extremes of
attitudes in the cradle. - 7. Situate the barrel and auxiliary shaft assembly
(1) directly over the pistons. Beginning with
the uppermost piston, steer them one at a
time into the barrel bores. Going back to the cam to a
level position in the cradle. - PARTS LIST
No.
Q!y.
Pirt No.
Explanation
1
1
See Fig 3
Barrel & auxiliary shaft ass y
2
2
033-71609
Override pressure lubes
3
2
492-15265
Connector
4
2
691-00902
0-ring
5
1
S1 3-43967
Tubing ass y (right sidei
6
1
S1 3-43966
Tubing ass y (left sidei
7
1
See Fig. 2
Rocker cam & stroking ass y
8
2
324-23216
Dowel pin
9
1
033-71546
Mounting flange
10
4
033-72664
Locating sleeve
No.
Qty.
Pirt No.
Description
1
2
033-49825
Face plate pins
2
1
033-71921
Barrel face plate P1 1 P only
1
033-71575
Barrel (ace plate P1 4P only
3
1
033-71602
Housing gasket
4
1
See Fig. 5
Housing assembly
Hydrostatic Parts and Denison Hydrostatic Repair
1. Put in the faceplate pins (1) in the holes given
in the barrel face.
2. Apply lubrication to the surface of the barrel
and place l the faceplate (2) over the faceplate
pins.
Warning
Make certain the faceplate is correctly seated on the barrel and pins with the steel side towards the barrel face. The faceplate has one side bronzed and this should be toward the port plate. If needed, remove coating from edge of plate to settle on bronze side.
3. Put in gaskets (3) over the two dowel pins in
the mounting flange.
Put together the housing assembly (4) over the bar
rel and auxiliary shaft assembly. Cautiously
guide the override tubes and pressure feed
tubes (items 2, 5 and 6, Figure 4) into the
housing assembly. Place the pressure feed
tubes in the slots in the housing face
Guidelines for Replenishing Circuit Isolation Plug- WARNING
- The isolation plug together with this is to be used only if an external filter circuit is not offered DO NOT operate this unit with the isolation plug put in unless an outside line has been provided.
When the outer filter circuit is not used, dispose of the isolation plug.
When the outside filter circuit is used, fit the isolation plug under the plug in the face of the port block. Use a 3/16″ hex wrench, 4″ minimum in length. Insert the isolation plug and tighten to 80-120 in./lbs. torque.
Warning
Filter should have a bypass and bypass indicator and Hydrostatic Transmission Service,LLC which offers Denison recommends that it be sized four times for projected flow.
Barrel and Auxiliary Shaft Assembly
1. Fit in the barrel (1) with the bores facing
down on a clean area.- Place the hold down spring (3) into barrel counter-
bore. - Put in spring retainer (5) into counter bore and
seat next to spring.
- Place the retaining ring (6) into barrel counter-
bore groove. Align retaining ring so that it is fully
seated in groove.
Fix the barrel stop (4) over auxiliary drive
shaft (2). Rotate barrel on side and put the auxiliary
drive shaft and barrel stop into the barrel
spline and hold down spring.- PARTS LIST
No.
a piip
».
P14P
Part Number
Explanation
1
1
–
513-45381
Barrel & sleeve assy Pi 1 P only
–
1
S13-43965
Barrel & sleeve assy PHP only
2
i
1
033-71603
Auxiliary drive shaft
3
i
t
033-71562
Holddown spring
4
1
1
033-71561
Barrel stop
5
1
1
033-71560
Spring retainer
6
i
1
033-71564
Retaining ring
1. Put in the port block (1) on a clean flat area with the two open ports up. THE OTHER SIDE OF THE 2. Condense check ring (3) and slip into the two 3. Need lock washers (6) on particular screws (5). Put in 4. Strand the socket pipe plugs (8) into port block. 5. Pass through two check valve assemblies (7) into 6. Place O-ring (10) on hollow hex plug (9) and |

Put the pump with the unplugged hole in the housing assembly at the 12 o’clock spot.
Place the gasket (5) on the housing assembly (6).
Mount the two special pins (3) in the face of the port block assembly. Submit an application of petroleum jelly or heavy grease to the plate (4) and pose port plate over the pins (3) on the port block.
Slip the port block assembly and port plate over the end of the secondary shaft. Always make certain that tubes 2, 3 and 4 shown on Fig. 4 are seated and that the port plate (4) is at rest on the pins (3).
As soon as the pump is correctly assembled, the valve-mounting surface will be at the top of the unit.
Fit the four bolts (1), and torque to 150ft. Ibs.
Warning
USE CARE TO AVOID DAMAGE TO THE VALVE MOUNTING AREA WHILE
PUTTING TOGETHER AND TORQUING THE TWO
TOP BOLTS
No. | Qty. | Part Number | Explanation |
1 | 1 | o33-_zi2aa | Port block (P & D units) |
| 1 | 033-71911 | Port block (V units) |
2 | 1 | 230-82146 | Needle bearing |
3 | 2 | 033-70502 | Check ring |
4 | 2 | 033-70489 | Clamp |
5 | 2 | 033-70908 | Special screw |
6 | 2 | 348-10016 | No. 10 Lock washer |
7 | 2 | S1 3-40266 | Check valve assy. (3/8-24 ext. thrds.) |
8 | 2 | 431-90404 | 1/4″ Soc. pipe plugs |
9 | 1 | 488-35041 | Hollow hex plug SAE-6 |
10 | 1 | 691-00906 | O-ring 90-6290-6 |
Qty | 1 | Req’d. for items 3, 4, 5, 6 & 7 for P6V units | |
No. | Qty. | Part Number | Explanation |
1 | 4 | 306-40182 | Hex head cap screw 5/8-1 1×9 |
2 | 1 |
| Port block assembly (see #1 above) |
3 | 2 | 033-49825 | Port plate pins |
4 | 1 | 033-71526 | RH port plate 6 in3 P & D units |
| 1 | 033-71903 | RH port plate 6 in3 V units |
| 1 | 033-71525 | LH port plate 6 in3 P & D units |
| 1 | 033-71904 | LH port plate 6 in3 V units |
| 1 | 033-72811 | RH port plate 7.25 in3 P & D units |
| 1 | 033-53388 | RH port plate 7.25 in3 V units |
| 1 | 033-53776 | LH port plate 7.25 in3 P & D units |
| 1 | 033-72937 | LH port plate 7.25 in3 V units |
5 | 1 | 033-70577 | Housing gasket |
6 | 1 | S1 3-42335 | Housing assembly |
7 | 1 | See Fig. 4 | Mounting flange |
HOUSING ASSEMBLY
- 1. Place housing (1) on a clean flat area
with the large open end up. - 2. Put bearing (2) in the housing bore. Put in
Pressing Plug tool (figure T-4) in the bearing.
With an even amount of steady pressure, press the
bearing into the housing bore until seated.
- HAMMERING OR BEATING INTO PLACE IS NOT RECOMMENDED
- 3. Rotate housing (1) on side and put together roll pin (4)
in the Vi” through hole in the control cover pad.
The pin needs to be 3/8″ under the pad area.
THE PIN END SHOULD NEVER COME IN CONTACT WITH
THE INTERNAL BEARING CAGE. Take two
dowel pins (3) in the blind holes in the same pad. - 4. Do this operation 3 on the opposite side of the
housing. - REVISE LIMITS OF WEAR PARTS
- REVISE LIMITS OF WEAR PARTS
- REVISE LIMITS OF WEAR PARTS
- REVISE LIMITS OF WEAR PARTS
- 5. Put O-ring (5) on plug (6) and place in
bottom of housing (1). (Roll pins (4) are in
bottom half of housing.)Put the three faceplate pins (1) in the holes that are in the barrel face.
2. Put a generous amount of grease to the face of the barrel and
place the face plate (2) over the pins (1) in the barrel.Always check to make sure the faceplate is properly seating on the barrel and pins with the steel side facing the barrel face. The Series 7.25 has only one side bronzed and this should be toward the port plate. If essential, remove coating from edge of faceplate to establish bronze side.
3. Put in the gasket (3) over the two dowel pins(item 6 on Fig. 4) in the mounting flange
4. Position the Housing assembly (4) over the Barrel and Auxiliary Shaft assembly and carefully guide the pressure tubes and tube lines (items 2, 3 and 4 on Fig. 4) through the Housing assembly (4).
Situate the pump in an horizontal position with the port block inlet and outlet pads turned facing down.
Setup the shaft and bearing (1) assembly in the mounting flange and cradle. Always check to see that there are no burrs or sharp edges on shaft seal surface of the shaft.
For a stiff shaft application use the shim (2) that results in the smallest amount clearance around the shaft bearing. It is very important not to use a shim with a floating shaft.
Fit the snap ring (3) in the mounting flange to keep the Shaft Assembly. Always line up the ring so that it is fully seated in the groove. The ring with the tightest fit is going to give the best results.
Warning
Previous to installing the seal assembly inspect all the parts. The lapped seal seat and the carbon ring have a meticulousness finish that must be handled with care. .Certainty that both parts are free of scratches, marks and cracks.
Rest the spring retainer (e) over the shaft and alongside the retaining ring on the shaft assembly. Situate the spring (d) alongside the retainer (e). Apply grease to the inside surface of the rubber friction ring (f) and arrange the shell containing the rubber friction ring (f) and carbon ring (c) over the shaft with the carbon ring uncovered. Apply grease to the square segment rubber seal (a) and fit on the cast iron seat (b). Insert the seat and seal in the seal retainer (6) with the lapped side of the seat in position to contact the carbon ring. Place the seal retainer assembly and gasket (5) over the shaft with the lapped surface beside the carbon face. Set the four gaskets (7) on the four screws (8) and include the seal retainer (6). Lower the seal retainer only far as necessary to start the four screws and tighten equally. Torque to 10 ft. Ibs.
NOTE
To avoid the rubber friction ring from seizing on the shaft the seal installation should be done as quickly as possible.
COUNTER-BALANCE SERVO STEM ASSEMBLYConsign the two spacers (11) on the two screws (12) and put in through the balance plate (10) and servo stem (9).
Introduce these parts through the opening in the side of the housing assembly and place the screws over the two 10-24 tapped holes in the rocker cam.
Embrace these parts adjacent to the cam and alternately tighten the screws (12) to hold the assembly steadfastly in place. Torque screws to 5 ft. Ibs.
PARTS LISTNo.
Qly.
Part Number
Explanation
1
1
S13-41805
No. 1 Splined Shaft Assy. See Fig. 1
1
S15-41806
No. 2 Keyed Shaft Assy. See Fig. 1
2
1
033-53948
Shim
1
033-53949
Shim (use only 1)
3
1
033-53901
Retaining Ring (use only 1)
1
033-53902
Retaining Ring (use only 1)
1
033-53903
Retaining Ring (use only 1)
4
1
62340006
Shaft Seal
5
1
033-70549
Seal Retainer Gasket
6
1
035-70516
Seal Retainer
7
4
631-45003
Nyltite Gasket
8
4
306-40144
Screw
9
1
033-71312
Servo Stem
10
1
033-70546
Balance Plate
11
2
033-71247
Spacer
12
2
358-10300
10-24 x 2-V. Soc. Hd. Cap Screw
13
8
631-45007
Nyltite Washer
14
8
353-25018
3/8-16 x 1-% Hex Washer Hd. Screw
15
1
See Below
Output Control Assy.
16
1
See Below
Input Control Assy.
17
8
306-40184
3/8-16 x 3% Hex Hd. Cap Screw
18
1
671-00017
O-Ring’
19
1
671-00048
O-Ring”
*Some controls use gasket 033-53575 in lieu of O-Rings

Cautiously take away the carbon ring and the remnants of the shaft seal from the shaft.Warning
- Do not scratch seal exterior of shaft when removing seal.
- Eradicate the snap ring (3) and the shaft and bearing assembly (1) and take away shim (2).
HOUSING I
Following the shaft assembly that has been set aside, arrangement of the unit on the end with the mounting flange turned face down.
- 1. Pressing the ends of the small tube lines away from
the housing. - 2. Raise up the housing from the mounting flange, eliminate
the gasket, and dowel pins from the
mounting flange. - 3. Do not take away the roll pins and the bearing
from the housing unless the bearing has been damaged
and needs to be replaced.
- ROCKER CAM AND CONTROL STROKING ASSEMBLY
Get rid of the whole assembly from the mounting cap and place on a clean flat surface with the two tubes (2) in a straight position and located at the top. Label the cam (24) and cradle (20) as indicated in Figure 3.These labels can decide positioning of parts during reassembly.
Cautiously remove the small tube lines (3) and (4) from the cradle.
IT IS IMPORTANT NOT TO BEND THE LINES.
Arranging of the assembly in an erect position on the flat surface of the cradle (20). Do away with the retaining ring (1) and thrust washer (2). Along with the piston and shoe assembly (4) and the creep plate (5) from the cam (24). With awareness remove the two setscrews (6a) and two screws (6) that secure the servo plate to the cam (24) and lay aside the servo input parts (7, 8 and 9).
Remove the four 7/16″ screws (10) and eight V*” screws (11) and (12) from the control covers (15R) and (15L). and the four dowel pins (16), remove the two chambers (17), remove the two special seals (18) and the four steel balls (19). Also remove the two vane seal cartridge assemblies (23) and the four-holddown vanes (22) from the rocker cam (24).
NOTE
A number of units may have thin shims under the hold-down vanes.
Eradicate the rocker cam (24) from the cradle (20). DO NOT TAKE THE PLUGS FROM THE ROCKER CAM.
- REVISE LIMITS OF WEAR PARTS
- 6 and 7.25 in.3
- Original Dimension
- Max. Rework From Original Dimension
- Min. Dimension After Rework
Port plate face
.315/.305″
.010″
.295″
Cylinder barrel face
4.480″
.010″
4.470″
Shoe retainer face
.314/.312″
.005″
.307′
Piston shoe face (pocket)
.019/.014″
.011/.006″
.008″
Creep plate face
.293/.291″
.010″
.281″
Face plate
None
Replace
Unit Disassembly
- The directions enclosed in this section cover a entire break up of the subject pump. Disassemble only as far as required to replace or repair any worn parts.
DISASSEMBLY
Place pump unit so that valve block assembly is on top. Work on a clean work area such as a stable work station competent enough of supporting the unit

CONTROLS See Figure 11
Take away the four screws (14) from the side (16) and do away with the input shear seal valve assembly.
Do away with the four screws (14) from the side cover (15) and eliminate the counter balance shear seal assembly.
Take away the two screws (12) and take out the servo stem (9) and balance plate (10).
VALVE BLOCK See Figure 11
- 1. Eradicate the eight hex head cap screws (17) and lift the whole block assembly from the port block.
- VALVE COVER See Figure 10
- 1. Take out the four screws (39) to divide the cover (21) from the block (11). Do not take away the check valves (19),
- 2. Place aside the plugs (43), (36) and pin (40). Put aside
the 8-32 nut from the bottom of cover (21) to
remove filter assembly (34). - 3. Put housing (29) and O-Ring (28),
items (30)7^(31), (32) and (33) as a unit. Put in
a small brass rod thru the hole in the housing
and tap out piston (27) and O-ring (26). - 4. Place a spring (25) and cone (24). Take away the seat
(23) and O-ring (22). - Note: Seat is ready for hex wrenching. Use %” 6 point socket with %” drive.
- VALVE BLOCK
1. Lay aside the O-ring (37) and replenishing release
valve (41). Examine the orifices (12) visually to insure
they are open. Do not remove unless damage
or clogging is visible.2. Springs need to be removed (16), (17) and (18). Next the
retainer (15) and poppets (13) arid (14) have to go.RETAINER PLATE
1. Set aside the four screws (4) from the plate (6)
and (11), gasket (7).Doing away with the seats (8) and (9). Do not eliminate Rolf
1. pins (5) and (10) unless replacements are
needed.BARREL HOLODOWN AND GEROTOR ASSEMBLY See Figure 9
- 1. Taking away the snap ring (17), end cover (15) and “O”
ring (16). - 2. Removing the pin (14), retainer ring (18), hold down nut
(13), thrust washers (10), bearing (11) and seal ring
(12).
- 3. The pressure plate needs to be moved away from (9), Gerotor side plate
(5a) “O” rings (7) and (8), needle bearing (5b). - 4. Do away with the Gerotor assembly (3), dowel pin (4),
key (2), and side plate (1).
- PORT BLOCK See Figure 8
1. Removing the four screws (1) that secure the port
block (2) to the housing (6). Use the correct measures when
getting rid of screws on valve block side to prevent
marring valve block face.2. Taking away the port block (2), gasket (5),
port plate (4) and port plate pins (3).Note: port plate will in some instances hold on to the port block upon disassembly.
See Figure 7
3. Remove the check valve assemblies (7) from the
port block.4. Next take away the needle bearing (2) from the port block.
5. Then eliminate two screws (5), lock washers (6), check- rings (3), and clamps (4). Only one check ring assembly in open loop pumps.
- BARREL AND AUXILIARY SHAFT
1. Take away face- plate (2, fig. 6) from face of barrel
assembly.2. Get rid of the barrel assembly (1, fig. 4) by grasping
the auxiliary shaft and lifting the whole assem
bly out of the housing.DRIVE SHAFT See Figure 11
Take away the four screws (8) and gaskets (7). Eriadicate seal retainer (6), and the stable part of the shaft seal (4). Refer to view of item 4.
